.png)

.svg)
If you’re wondering whether that musty smell or soft spot in your trim means trouble, you’re in the right place.
In the next few minutes, we’ll walk through the signs of dry rot, where it usually hides, how to check for it safely, and the 12 red flags we use in the field to decide whether we’re dealing with minor cosmetic issues or something that can affect structural integrity. We’ll keep it practical, friendly, and packed with examples you can use today.
Quick answer: what are the first signs of dry rot?
When clients ask, “what are the first signs of dry rot?”, we give them a simple checklist:
- A damp, musty, earthy odor that lingers, often stronger after rain or showers.
- Wood that feels dry and brittle yet crumbles like powder under light pressure.
- A cube-shaped cracking pattern across the grain (think “checkerboard”).
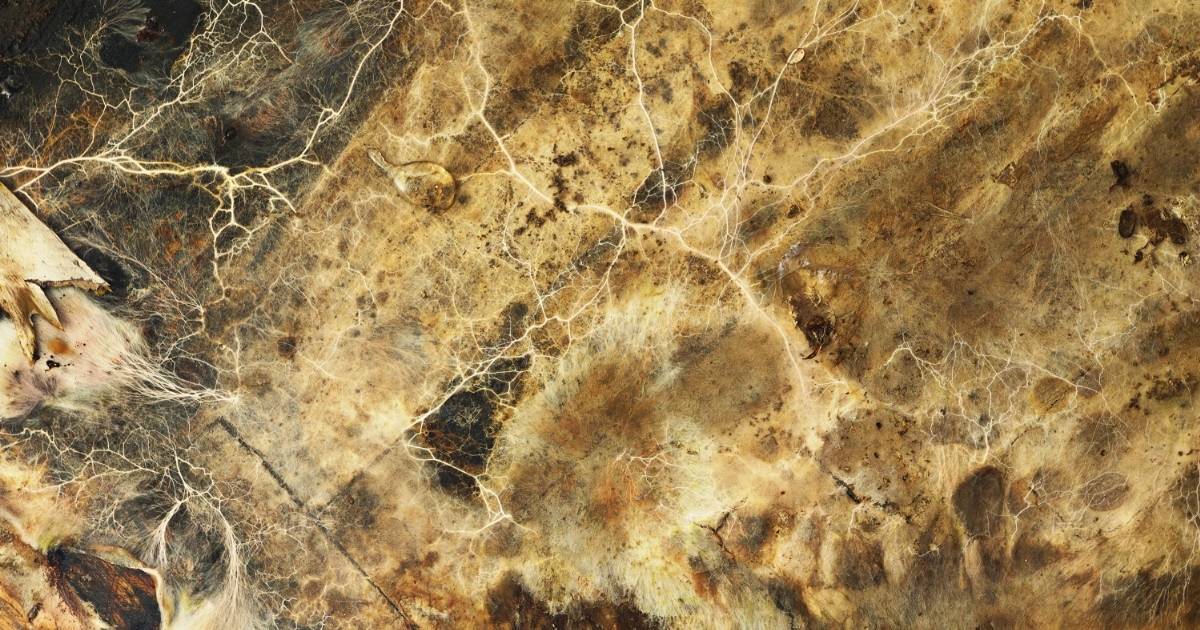
- Fluffy white or gray mycelium (cotton-like strands), and in advanced areas, rust-colored spore dust under mushroom-like fruiting bodies.
- Discolored, shrunken, or warped wood, stained drywall, and sunken or creaky floorboards where moisture hangs around.
If two or more of those show up in the same area especially near a moisture source, we should investigate.
Dry rot, in plain language (and why we should care)

Dry rot is a wood-decaying fungus that needs moisture to get established. Once it finds damp wood or timber, it spreads via microscopic spores and mycelium (those cottony strands you may see on or within wood).
Over time, it breaks down the structural fibers, turning strong lumber into brittle, powdery material. That can mean loose fasteners, sagging floors, or trim and siding that crack and peel no matter how many times you repaint.
Here’s the hard truth: rot rarely stays put. It often grows within a wall cavity or crawl space long before it shows up on the surface. Catching early signs of dry rot is the best way to save money and protect your home.
What dry rot looks, smells, and even sounds like
Wood texture: powdery and fragile
Healthy wood resists your probe. Rot-weakened wood crushes or powders easily. If you can push a screwdriver into a sill or trim board with minimal effort, we’re past the cosmetic stage.
Cracking pattern: cube-shaped
The classic hallmark is deep, cube-shaped cracking across the grain. When we see that “checkerboard” look especially alongside discoloration—we immediately check for moisture sources.
Fungal growth: mycelium and fruiting bodies
You might spot white or gray cotton-like strands creeping along joints, across sheathing, or inside cavities. In advanced stages, you could see grayish-white skin on the wood and mushroom-like growths that shed reddish-brown spore dust.
Color and shape changes
Rot can make wood look darker, shrunken, or oddly charred, and you may notice warping or gaps where boards used to meet cleanly.
What you’ll smell and hear
- Smell: a musty, earthy odor is a big clue—especially in damp corners, bathrooms, basements, or crawl spaces.
- Sound/feel: creaky or bouncy floorboards that seem to sag or pull away from walls can indicate lost strength.
How we check for dry rot (step by step)
Step 1. Follow your nose.
- Start in moisture-prone areas: under sinks, around tubs and toilets, behind the washing machine, near exterior doors, in basements/crawl spaces, and under roof penetrations.
Step 2. Do a press test.
- Gently press with a screwdriver or even your fingers (wear gloves). If the surface crumbles or feels spongy, the wood has lost integrity.
Step 3. Scan for visual hallmarks.
- Look for cube cracking, mycelium, and spore dust on ledges below suspicious spots.
Step 4. Trace the moisture.
- Check for leaky pipes, failed caulk, missing flashing, clogged gutters, or downspouts that dump water against walls.
Step 5. Decide whether to open it up.
- If the press test fails near a structural component (sill, joist, stringer), we plan for a controlled exploratory opening or professional moisture-meter reading.
Step 6. Document everything.
- Photos and notes help you compare changes and make good repair decisions.
The 12 red flags we never ignore
Think of this as your field guide. If you recognize several of these in one area, it’s time to act.
1. Spongy or crumbly wood
A gentle press that sinks the tool or turns wood to powder is a sign of significant decay.
2. Musty, earthy odor
Especially near damp corners, showers, or below windows and doors. Odor is often the earliest clue.
3. Cube-shaped cracking
The distinctive checking across the grain screams dry rot. If it’s on a sill or rim joist, we should take it seriously.
4. White/gray mycelium
Those cotton-like strands act like fungal highways. If you see them, there’s almost always a moisture problem nearby.
5. Rust-colored spore dust
Check ledges, floor edges, or surfaces beneath suspicious growths for a fine reddish-brown dusting.
6. Discolored/shrunken/warped wood
Boards that have shrunk, pulled away, or darkened, along with paint that refuses to hold—point to underlying decay.
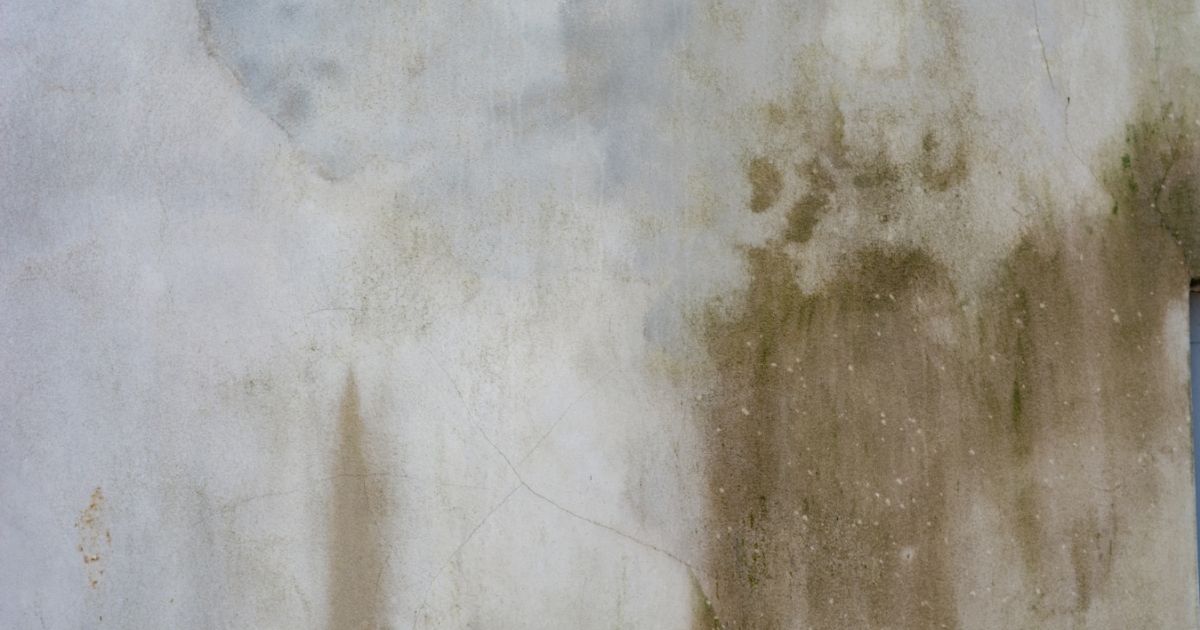
7. Stained or bubbled drywall
Brown streaks, soft corners, or peeling paint over framing members often trace back to damp, decaying wood.
8. Sunken, creaky, or bouncy floors
When subfloor or joists weaken, the floor can dip, creak, or feel springy underfoot.
9. Sticking doors and windows
Frames shift as wood shrinks or swells from rot and moisture. If you also see soft wood at the corners, connect the dots.
10. Loose or rusted fasteners
Screws that won’t bite and nails backing out mean the wood fibers no longer hold.
11. Persistent moisture
Ongoing leaks, wet crawl spaces, or poor ventilation feed the fungus. Dry rot doesn’t flourish without damp conditions.
12. Heat + damp + odor in enclosed spaces
Crawl spaces and attics that trap warmth and moisture are prime incubators. Add a musty odor, and it’s time to investigate.
First signs of dry rot vs. early signs of dry rot
Let’s separate subtle clues from early visible damage so we can act at the right moment.
First signs of dry rot
- A faint musty odor that seems out of place.
- Slight discoloration or dulling of wood’s natural tone.
- Hairline surface checks and minimal warping.
- Paint that looks tired too soon—especially at bottom corners of trim.
- Condensation or dampness lingering longer than it should.
Early signs of dry rot
- Cube-shaped cracking visible without magnification.
- White/gray mycelium strands along seams or in hidden corners.
- Stained drywall near plumbing or exterior penetrations.
- Softness on the press test even if the surface appears fine.
- Minor floor bounce near bathrooms, kitchens, or exterior doors.
If you’re spotting multiple early indicators, it’s time to stop moisture at the source and plan for a targeted inspection.
Signs of dry rot in house: where we look first
We always start where water may be present:
- Bathrooms: tub/shower walls, toilet bases, vanity backs, and the floor outside the shower curb.
- Kitchens: sink cabinets, dishwasher sides, fridge supply lines, and the toe-kick area.
- Laundry: washer supply/overflow pan, wall behind units, and floor edges.
- Basements & crawl spaces: rim joists, sill plates, posts, and any wood that touches masonry.
- Attics: around roof penetrations, valleys, and soffits, especially where ventilation is poor.
- Exterior doors and windows: bottom corners, thresholds, and siding or trim nearby.
Signs of dry rot in walls
Walls can hide a lot. Here’s how we narrow it down without tearing everything open:
- Visual cues: stained drywall, bubbling paint, or baseboard caulk that’s splitting.
- Touch test: lightly press low on the wall, especially near tubs, showers, or exterior doors.
- Probe points: base plates, lower studs, and the bottom 6–12 inches of drywall—these are ground zero for moisture wicking.
- Listen while you walk: a creak or subtle crunch along the baseboard line can be a tip-off that framing is compromised behind the wall.
If the wall feels soft or sounds hollow, we may be dealing with hidden decay along the framing.
Signs of dry rot in wood
This might sound obvious, but certain materials telegraph problems sooner:
- Trim and fascia: Sun + rain + end-grain exposure = fast failure if joints aren’t sealed.
- Deck boards and stair stringers: Splashback and trapped water speed up decay, especially where boards meet posts.
- Sills and rim joists: Any weakness here is a structural concern. If the screwdriver test bites easily, we plan for repair.
- Window stools and sashes: If paint keeps failing and the wood powders when sanded, assume moisture is getting in.
Watch for brittle edges, shrinkage, and gaps that didn’t exist last season.
Signs of dry rot on door frame
Door frames take a beating from foot traffic, hoses, and sprinklers, and they’re often built with end grain close to grade.
- Soft thresholds and jamb feet: The bottom 2–4 inches tell the story.
- Alligatoring paint at the lower corners, especially on the hinge side.
- Separation from the wall or sill, leaving small but persistent gaps.
- Misaligned latches and sticking that appears after wet weather.
If we see rot at the base of the frame, check the subfloor and the first joist bay inside the door. Water rarely stops at the threshold.
“Is this rot or termites?” A quick side-by-side
If you’re unsure, don’t guess. The repair path for each problem is different, and misdiagnosis wastes time and money.
What causes dry rot (and how we stop it)
Dry rot occurs where moisture meets wood in a warm, poorly ventilated space. Some common triggers:
- Leaky plumbing or slow drips that go unnoticed for months
- Failed flashing or caulk at windows, doors, and siding joints
- Clogged gutters and downspouts that dump water against the house
- Grade sloping toward the foundation, pushing water into sill plates
- Poor ventilation in crawl spaces and attics
- Untreated or improperly treated lumber in wet zones
Stopping the water changes everything. The fungus can’t advance without the damp environment that feeds it.
A simple action plan if you suspect rot
- Eliminate the water source. Fix the leak, improve drainage, or restore ventilation first.
- Dry the area thoroughly. Use fans and dehumidifiers; remove wet materials that won’t dry quickly.
- Assess the extent. Map soft zones with the press test. If structural members (sills, joists, stringers) are involved, plan for professional evaluation.
- Remove decayed wood. Carefully cut out material until you reach sound fibers. Decay doesn’t glue back together.
- Treat adjacent wood. Use appropriate borate or fungicidal treatments on surrounding members to help prevent re-colonization.
- Rebuild with the right materials. Consider treated lumber, rot-resistant species, or non-wood alternatives where practical.
- Restore finishes and details. Prime and paint or seal exposed end grain; reinstall proper flashing and backer/caulk systems.
- Monitor. Recheck the area after heavy rain and season changes. Early monitoring saves surprises.
Prevention that actually works
You don’t need to obsess—just a few consistent habits:
- Keep water away from the house. Clear gutters, extend downspouts, and maintain a downhill grade away from the foundation.
- Seal the envelope. Check caulk and flashing at windows, doors, deck ledgers, hose bibs, and vent penetrations.
- Ventilate the wet zones. Run bath fans long enough to clear humidity; add a dehumidifier to basements if needed; ensure crawl spaces have proper airflow and vapor barriers.
- Respect end grain. Prime and seal cut ends of trim and siding before installation.
- Choose smarter materials. In splash zones, use treated lumber, rot-resistant species, or composite alternatives.
- Inspect seasonally. Walk the perimeter each spring and fall. Bring a screwdriver. If you find soft spots, you’ve just saved future you a lot of anxiety.
When it’s more than a DIY touch-up
We all love a good home project, but dry rot can go from “minor patch” to “structural repair” fast:
- The damage sits within a wall, crawl space, or structural connection.
- You see mycelium spread across multiple members, or spore dust keeps returning.
- The press test fails on sills, joists, stair stringers, or deck ledgers.
- Sunken floors, widening gaps, or misaligned doors suggest load-bearing components are affected.
In these cases, it’s worth bringing in a pro who can scope the area, plan safe removals, and rebuild so you don’t chase the same problem again next year.
Ready for a professional set of eyes?
If you’d like help confirming what you’re seeing—or you want a plan to remove, treat, and rebuild the right way—Rot Doctor can walk the space with you, document the findings, and handle repairs that restore both safety and peace of mind.
Send us a few photos, tell us where you notice odors or softness, and we’ll guide you through the next steps. We’re here to help you catch problems early and fix them for good.
FAQs
How to tell if a house has dry rot?
Look for signs of dry rot: a musty, earthy odor; brittle, powdery wood; cube-shaped cracking across the grain; white/gray mycelium or rust-colored spore dust. Check moisture-prone areas (bath, kitchen, crawlspace). Do a gentle press test with a screwdriver—soft, crumbling wood indicates decay.
How to recognize dry rot?
Dry rot shows as discolored/shrunken/warped wood, bubbling paint, stained drywall, and creaky or bouncy floors near leaks. The hallmark is cube cracking plus fungal growth (mycelium). Confirm by tracing a moisture source and probing the wood; sound wood resists the tool.
How to fix dry rot on house?
Stop the moisture first (repair leaks, improve drainage/ventilation). Remove decayed wood to sound fibers, treat adjacent areas with appropriate borate/fungicide, then rebuild with rot-resistant or treated materials. Prime/seal end grain and restore flashing/caulk to prevent recurrence.
Can dry rot spread from house to house?
Dry rot spreads via spores where suitable moisture and wood exist. It doesn’t leap between buildings on its own, but spores can hitch a ride on contaminated materials, tools, or debris. Control moisture and follow proper remediation/disposal to prevent transfer.
What can be mistaken for dry rot?
Common look-alikes include termite damage (longitudinal galleries, frass, mud tubes), water-stained but sound wood, and surface mold without cube cracking or brittleness. Dry rot is defined by brittle, powdery wood, checkerboard cracking, and often mycelium.
Can a house be saved from dry rot?
Yes. Most homes are repairable if you act early: stop moisture, remove and replace affected members, and treat the perimeter. Even structural areas (sills, joists, stringers) can be restored with engineered repairs when planned and executed by qualified pros.

.svg%20fill.svg)